
How to Use The Falcon Player (FPP)
Learning how to install and use the Falcon player definitely presented some challenges for installation and how to use it. I had purchased a Rasberry Pi because it was on sale so I wanted to give it a try. If this is your first year working with Christmas lighting, I wouldn’t recommend using the Rasberry Pi.
In this first video, I walk through on how to install FPP or also known as Falcon Player.
How to Install FPP
To get started the most reliable resource I was able to find was the forum on falconchristmas.com and the topic was FPP2.x Installation Instructions.
The first step is to download the latest version of FPP from Github.com. You’ll also need a program to “burn” the FPP file to your SD card, such as ApplePi Baker for Mac users or Balena Etcher for Windows users.
Once you have done this, the next step is to download an SD card format tool: https://www.sdcard.org/downloads/formatter/
Burning Image to SD Card
Once you download and unzip the file for the SD Card formatting tool you can follow the prompts as needed to complete the setup.
After installing the program, you’ll be overwriting any factory settings that came with SD Card. First, you’ll select the card if it isn’t selected. Select “Overwrite Format” and then enter a name in the label box. Once done, click “Format”.

Next, you’ll want to launch the either the ApplePi or Balena Etcher program. In this tutorial, we’re using the Windows version.

To burn the image to the SD Card you’ll need to first select the file which will have the .pi at the end of it. The target should automatically select your SD Card and then click “Finish”.
Once it finishes, you will get a success message pop up. You’ll then want to close your programs and pull out your SD Card from the computer. Next, grab your Rasberry Pi to get ready for the next step.
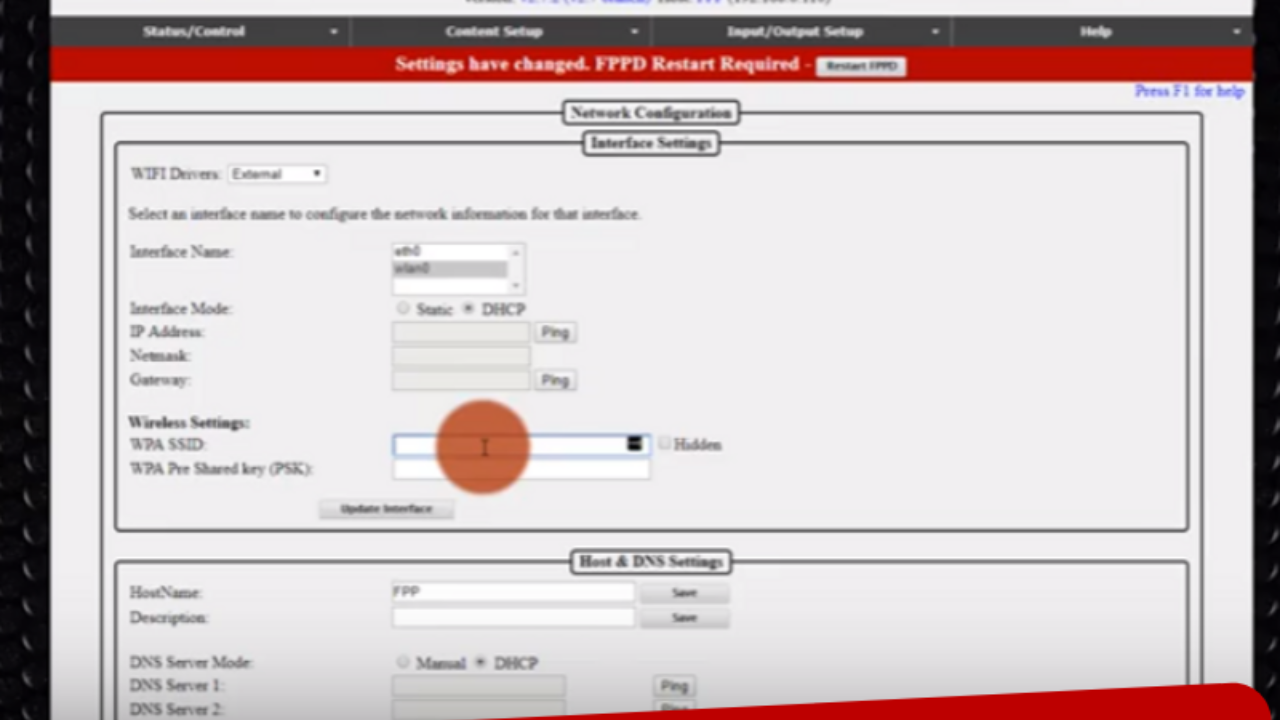
Setting Up Your Falcon Player
The next step for the setup is plugging in your SD Card into the Pi/BBB, connecting to a network cable, and powering it on. When the unit powers on it should have the lights come up on the unit itself.
After 30 seconds of the unit being powered on go to your web browser and type in: http://fpp.local and this should pull up the FPP Falcon Player as seen below.

You will have a notice on the top of the page stating the SD Card has unused space. By clicking “Advanced Settings” you can create a new partition to save your shows.
To create a new partition just click “Advanced Settings” and then click “Grow File System”. You will be brought to a new page and the bottom it will say Please Reboot, so let the system reboot. Once it is is rebooted then the new partition has been created.
Using FPP (Falcon Player) to Output to Pixels
After being able to install FPP and the next step is to set up the output and begin building out your playlist. In this next video, I walk through the steps on how to set this up.
After working through this video I realized that it is very important to note that you need to either have a network switch or be setting this up next to your router so that your Falcon Player, lights, and Pi can all connect with each other.
Pulling Sequence Files from xLights
I had originally set up my sequences through a program called xLights. If you used a different program the process should be similar. You do want to make sure you are able to pull the files as .fseq.
The best method is to export your sequences through the FPP Connect. Please make sure your FPP is connected and running so the programs are able to connect and pull the sequences.
Using the FPP Upload, you can select any files you decide you want to work with to build out your sequence. Press “Upload” when you select the items you want to work with.
Setting Up Sequences on FPP
Once you are able to pull the files for your sequence you want to open up your Falcon Player. On the top menu bar select Content Setup and then select “Playlists”. The following page should come up for you.

Create and name a new playlist and click “Add”. Under the Playlist details and New Playlist Entry, you can select the type. In this video, we are working with a sequence only. When you make your selection just click “Add”. Under make playlist, you should see your new sequence come up. When done be sure to click “Save”.

If you’re ready to use the scheduler, select “Scheduler” from the Content Setup drop-down and then you can add your new playlists.
Checking the Settings
While setting this up you want to be sure that you have the right settings. On the top menu bar, you want to go to Input/Output Settings and then select “Channel Outputs”. On this screen make sure the output is set up and then set the interface and the universes. Most changes will require you to do a reboot.
The next step is to set up your scheduler. For testing purposes, I had just set it to run all the time. You can set this up under Content Setup and then go to Scheduler.
To check what your system is doing, you can always go to Status/Control on the top menu to check what your system is doing. If you did set up a scheduler it would tell if the sequence you had set up is running.
As I had mentioned earlier make sure you are able to set up everything either next to your router or use a Network Switch. This will make the setup and testing so much easier for you.
Want to Create a Great Christmas Lighting Display This Year?
Grab our free guide and get started today:

