

Getting Started with xLights: A Beginner's Guide
If you're new to the world of holiday light shows, the xLights software can seem overwhelming at first glance. This guide will walk you through the essential first steps to get your holiday light show project off the ground. We'll cover creating your show file, setting up your house layout, and beginning to sequence your first effects.
Follow along with the video here!
Step 1: Creating Your xLights File
When you first open xLights, you won't see the main interface right away. Instead, a pop-up window will appear asking you to choose a show folder. This folder is where all your project's files will be stored, including your layout and all of your light sequences.
- Choose a Location: I recommend creating a new folder for your project in a place like your Documents folder.
- Syncing: If you plan to work on multiple computers, you can use a cloud storage service like Dropbox or Google Drive. However, be careful not to have the same project open on two computers at once, as this can cause file issues.
Once you've created and selected your show folder, the main xLights interface will open.

Image: The first screen you'll see is the Controllers tab
Step 2: Understanding the Main Tabs
The xLights interface is organized into several tabs. For a beginner, the most important ones are Controllers, Layout, and Sequencer.
- Controllers Tab: For the purposes of this tutorial, you can ignore this tab for now. You only need to use the Controllers tab once you have physical lights and hardware to connect.
- Layout Tab: This is where you'll create a digital representation of your house and props, in 2D or 3D. You'll spend most of your time here initially.
- Sequencer Tab: This is where you'll program the effects and animations for your lights, creating your holiday light show.
Step 3: Setting Up Your Layout
The layout tab is where you'll build your virtual display. The goal here is to create a model of your house and all the props you plan to use. Don't worry about being perfect; you can always make adjustments later.
Adding Your Background Image
The first step is to add a background image of your house.
- Get an Image: Take a nice, flat, head-on photo of your house. A pro tip is to use your phone's camera and stand far enough away so you can keep the zoom at 1x, but don’t use a wide angle. This will prevent distortions and help your layout be more accurate.
- Upload the Image: In the layout tab, click the three dots next to the Background Image field to browse and select your photo.
- Adjust Brightness: Once the image is loaded, adjust the Brightness slider down from 100% to a level where you can still see your house but the background isn't too distracting.
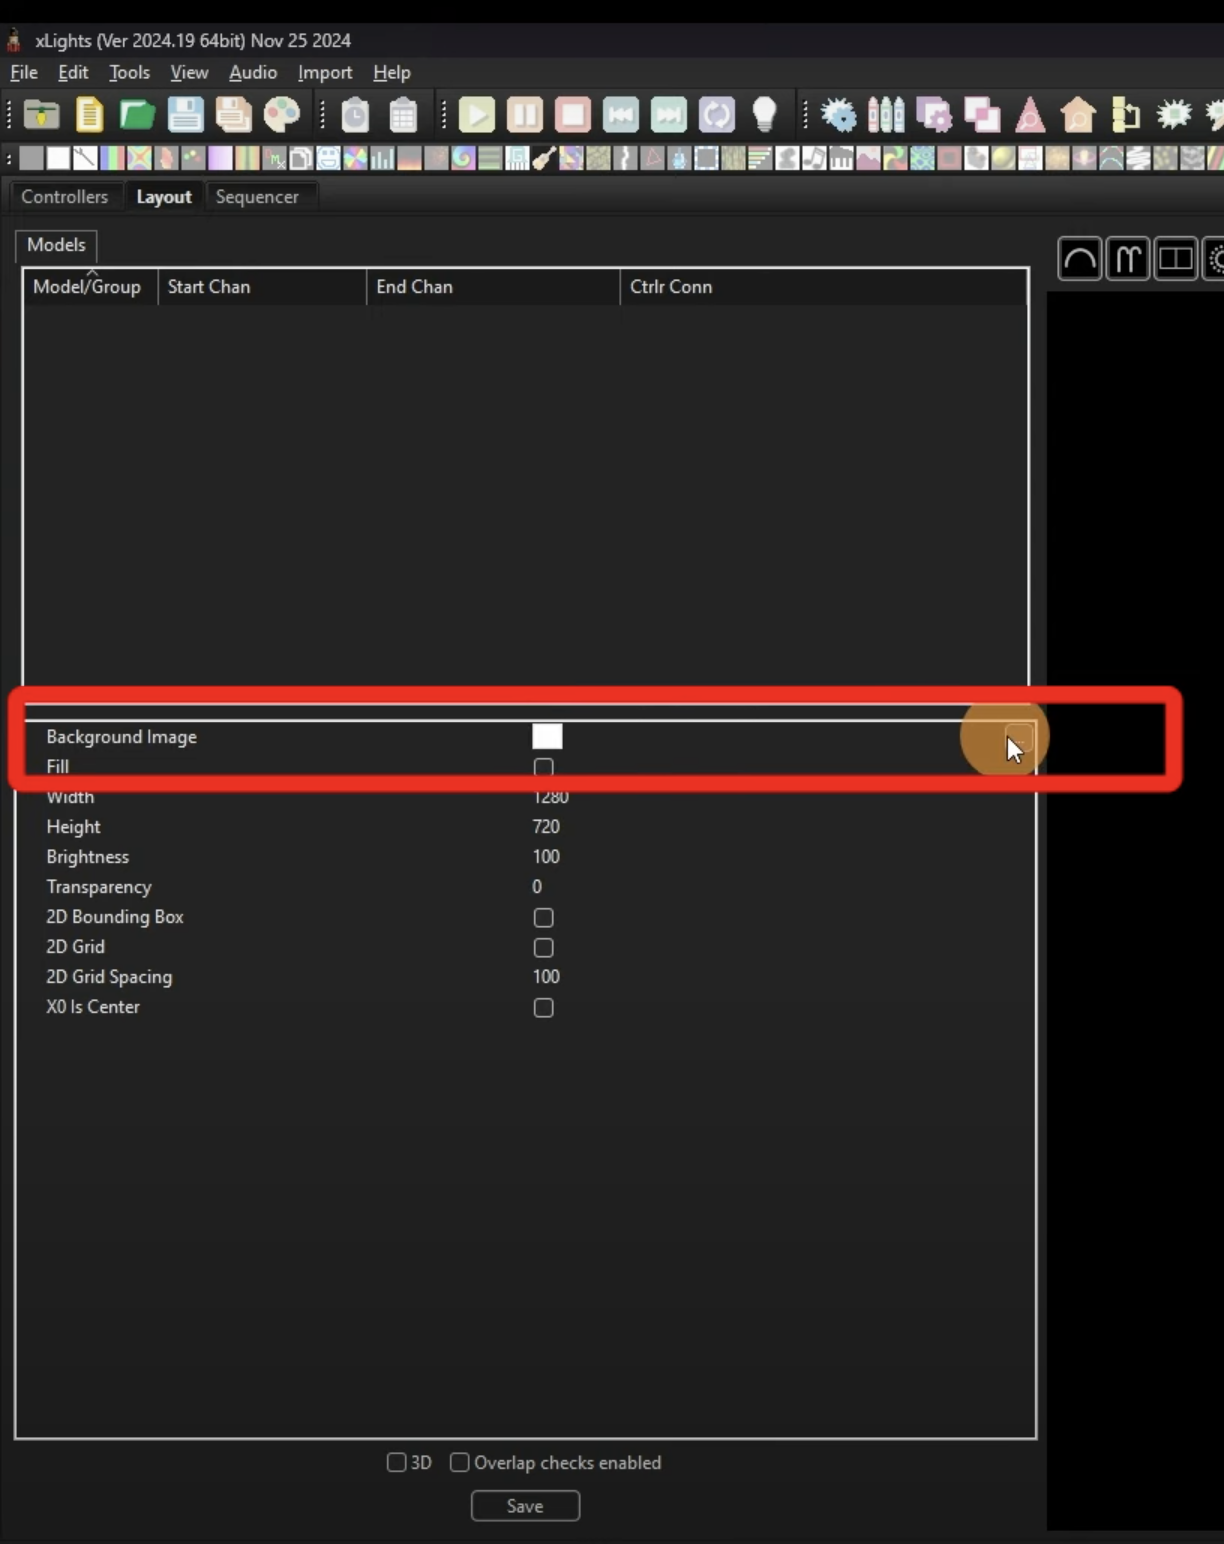
Image: Click the three dots to open the browser window and upload your background image
Placing Props on the Layout
Now you're ready to add your props—the lights you'll be using.
- Generic Models: On the right side of the screen, you'll find a list of generic models like "Mega Tree," "Icicles," "Window Frames," etc. Simply drag and drop these onto your background image to represent the lights you have or plan to get.
- Custom Props: If you have custom props, such as those made from Coro plastic, you can go to Create New Download or Create new Import Custom to access a library of user-submitted models, or upload the model you bought from a vendor. Find your prop, insert it, and place it on your layout.
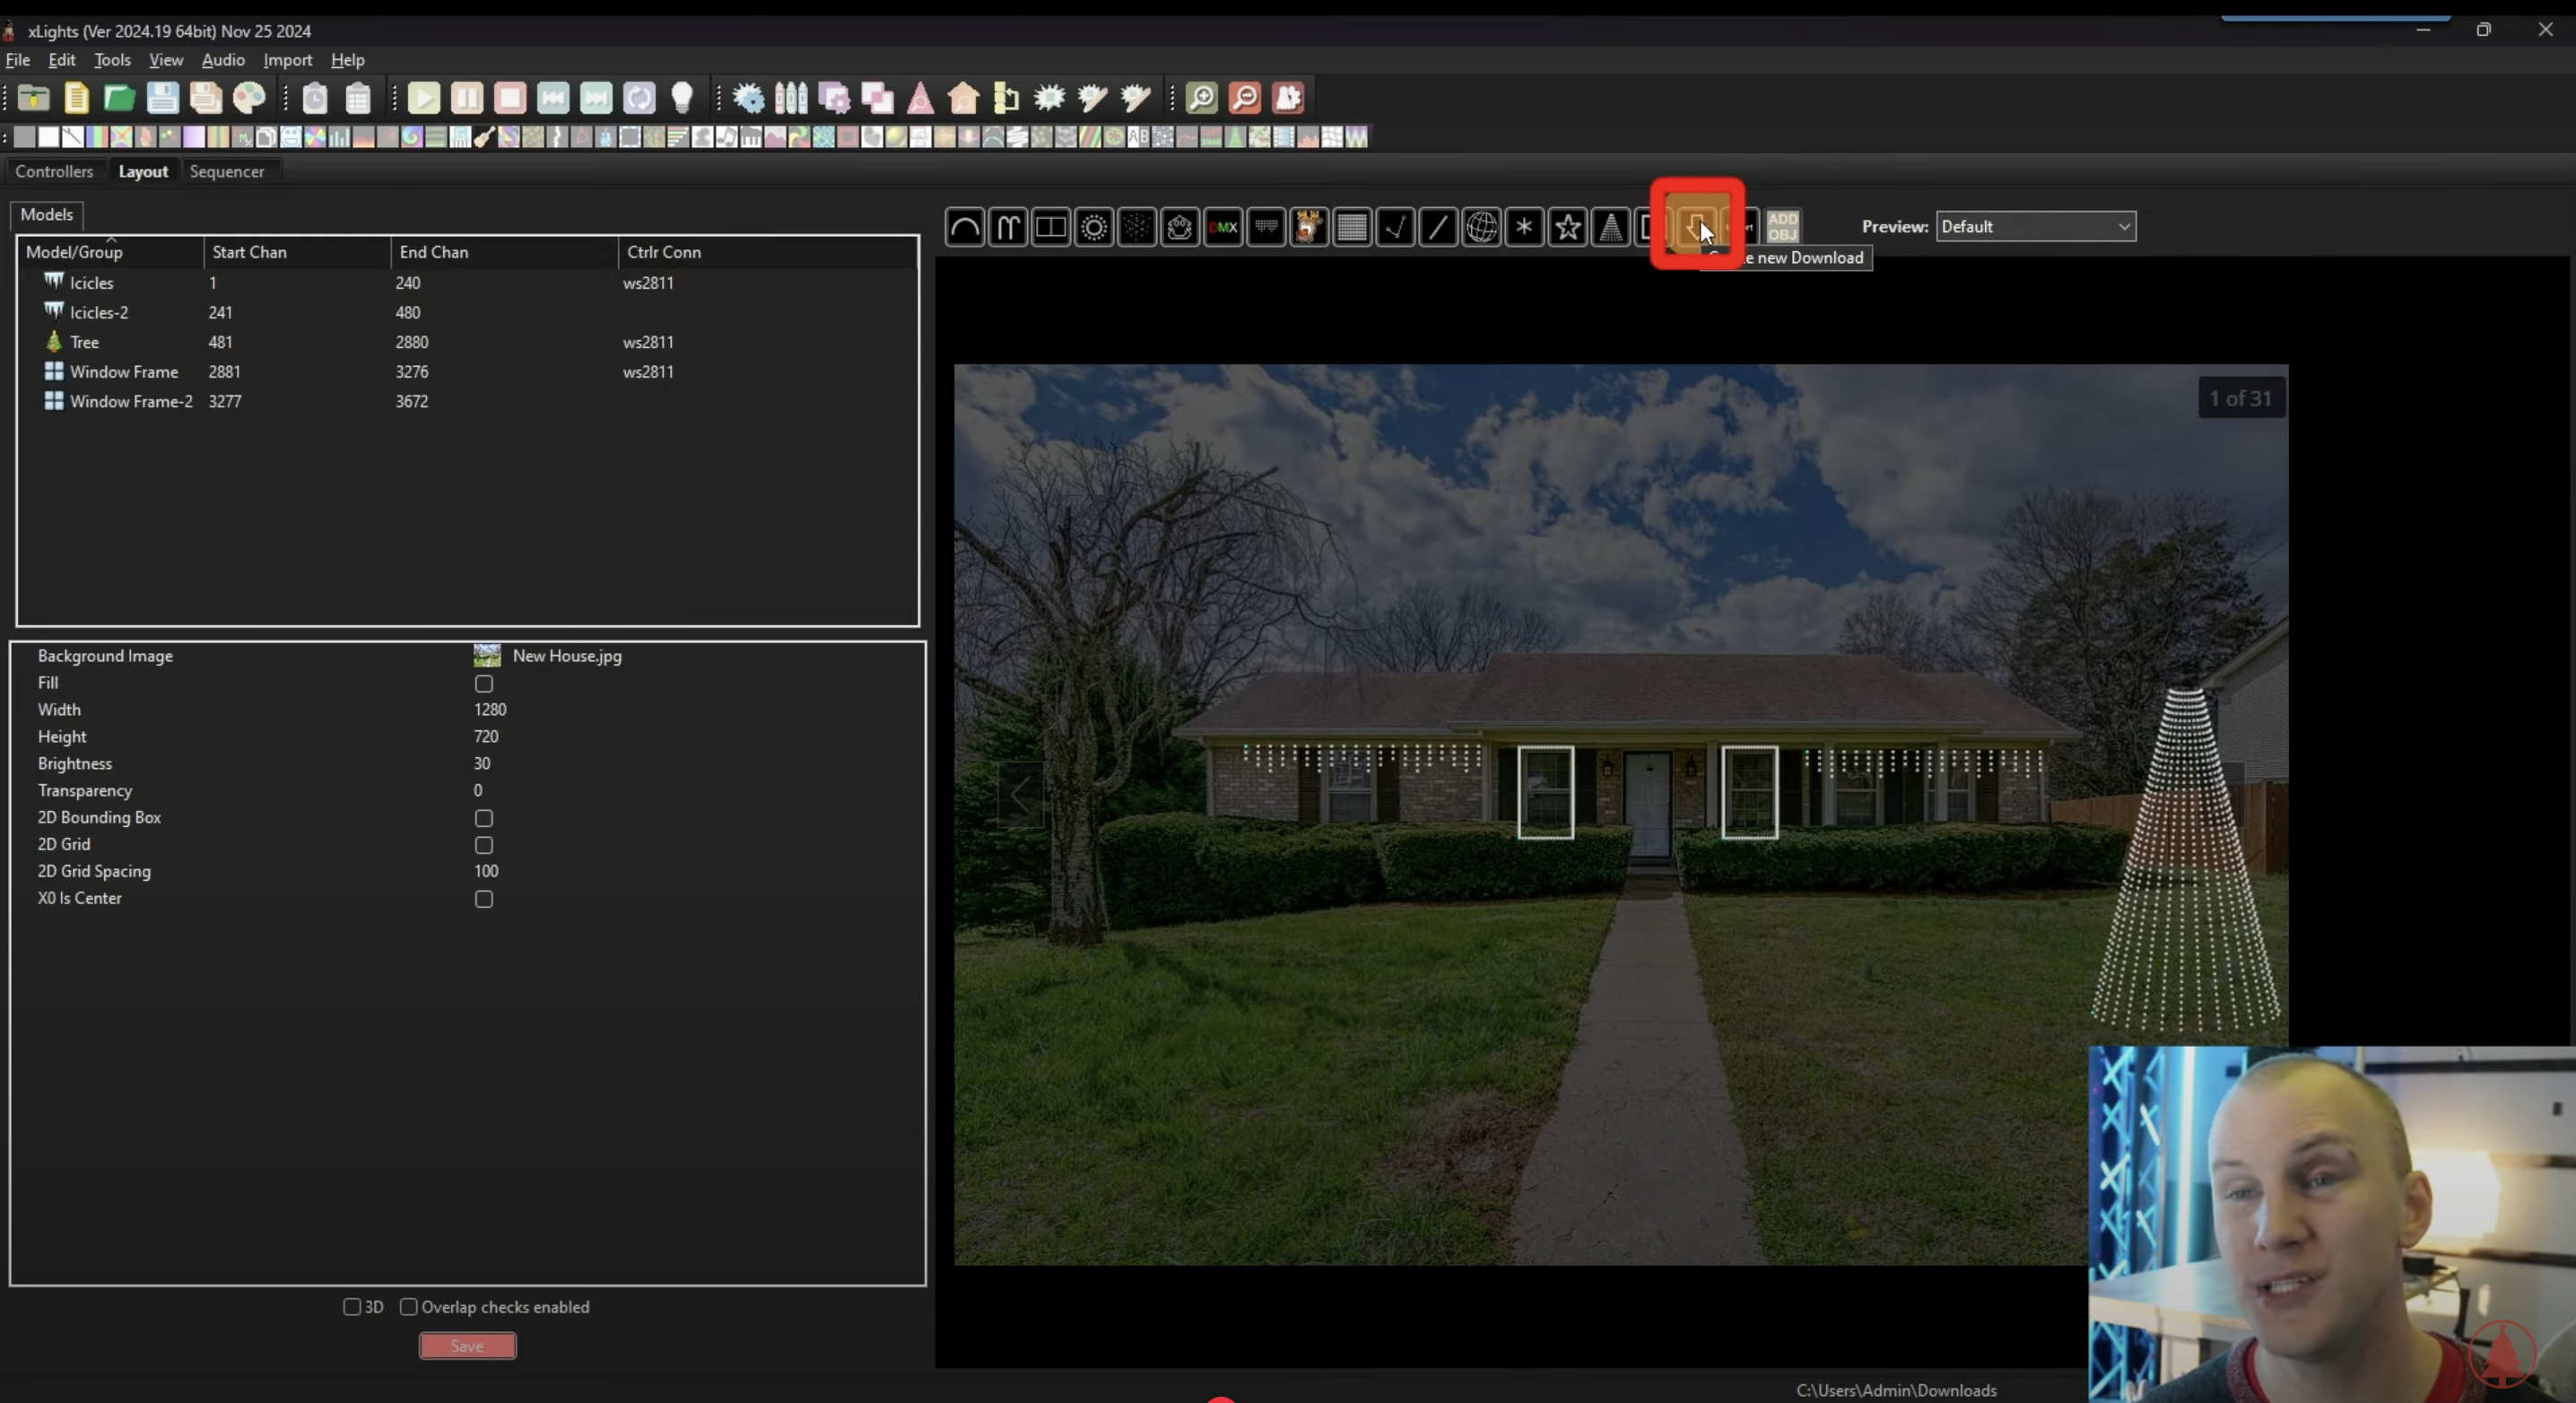
Image: Click the "Create New Download" button or the one next to it "Create new Import Custom"
- No Need for Perfection: When modeling, it's not critical to have the exact number of lights for each prop. You can program your show with a rough layout and then go back later to adjust the exact light counts. The effects will adapt automatically.
- Save Your Work: Remember to hit the Save button regularly to save your progress.
Step 4: Starting Your First Sequence
A sequence is the program that tells your lights what to do.
- Create a New Sequence: Go to the Sequencer tab and click New Sequence.
- Choose a Sequence Type: You have two options: Musical or Animation. For this beginner's guide, we'll choose Animation.
- Set the Frame Rate: The frame rate determines how many frames per second your show will run at. In the past I’ve usually recommended 20fps, but as shows get denser with more HD, 40 frames per second is often a better option to run these new options.
- Quick Start: Click Quick Start to create your sequence. For now, skip the warnings about selecting a media file.
Adding Effects
Once the sequence is created, you'll see a timeline on the right. Your props will be listed in a column, and the top section displays various effects.
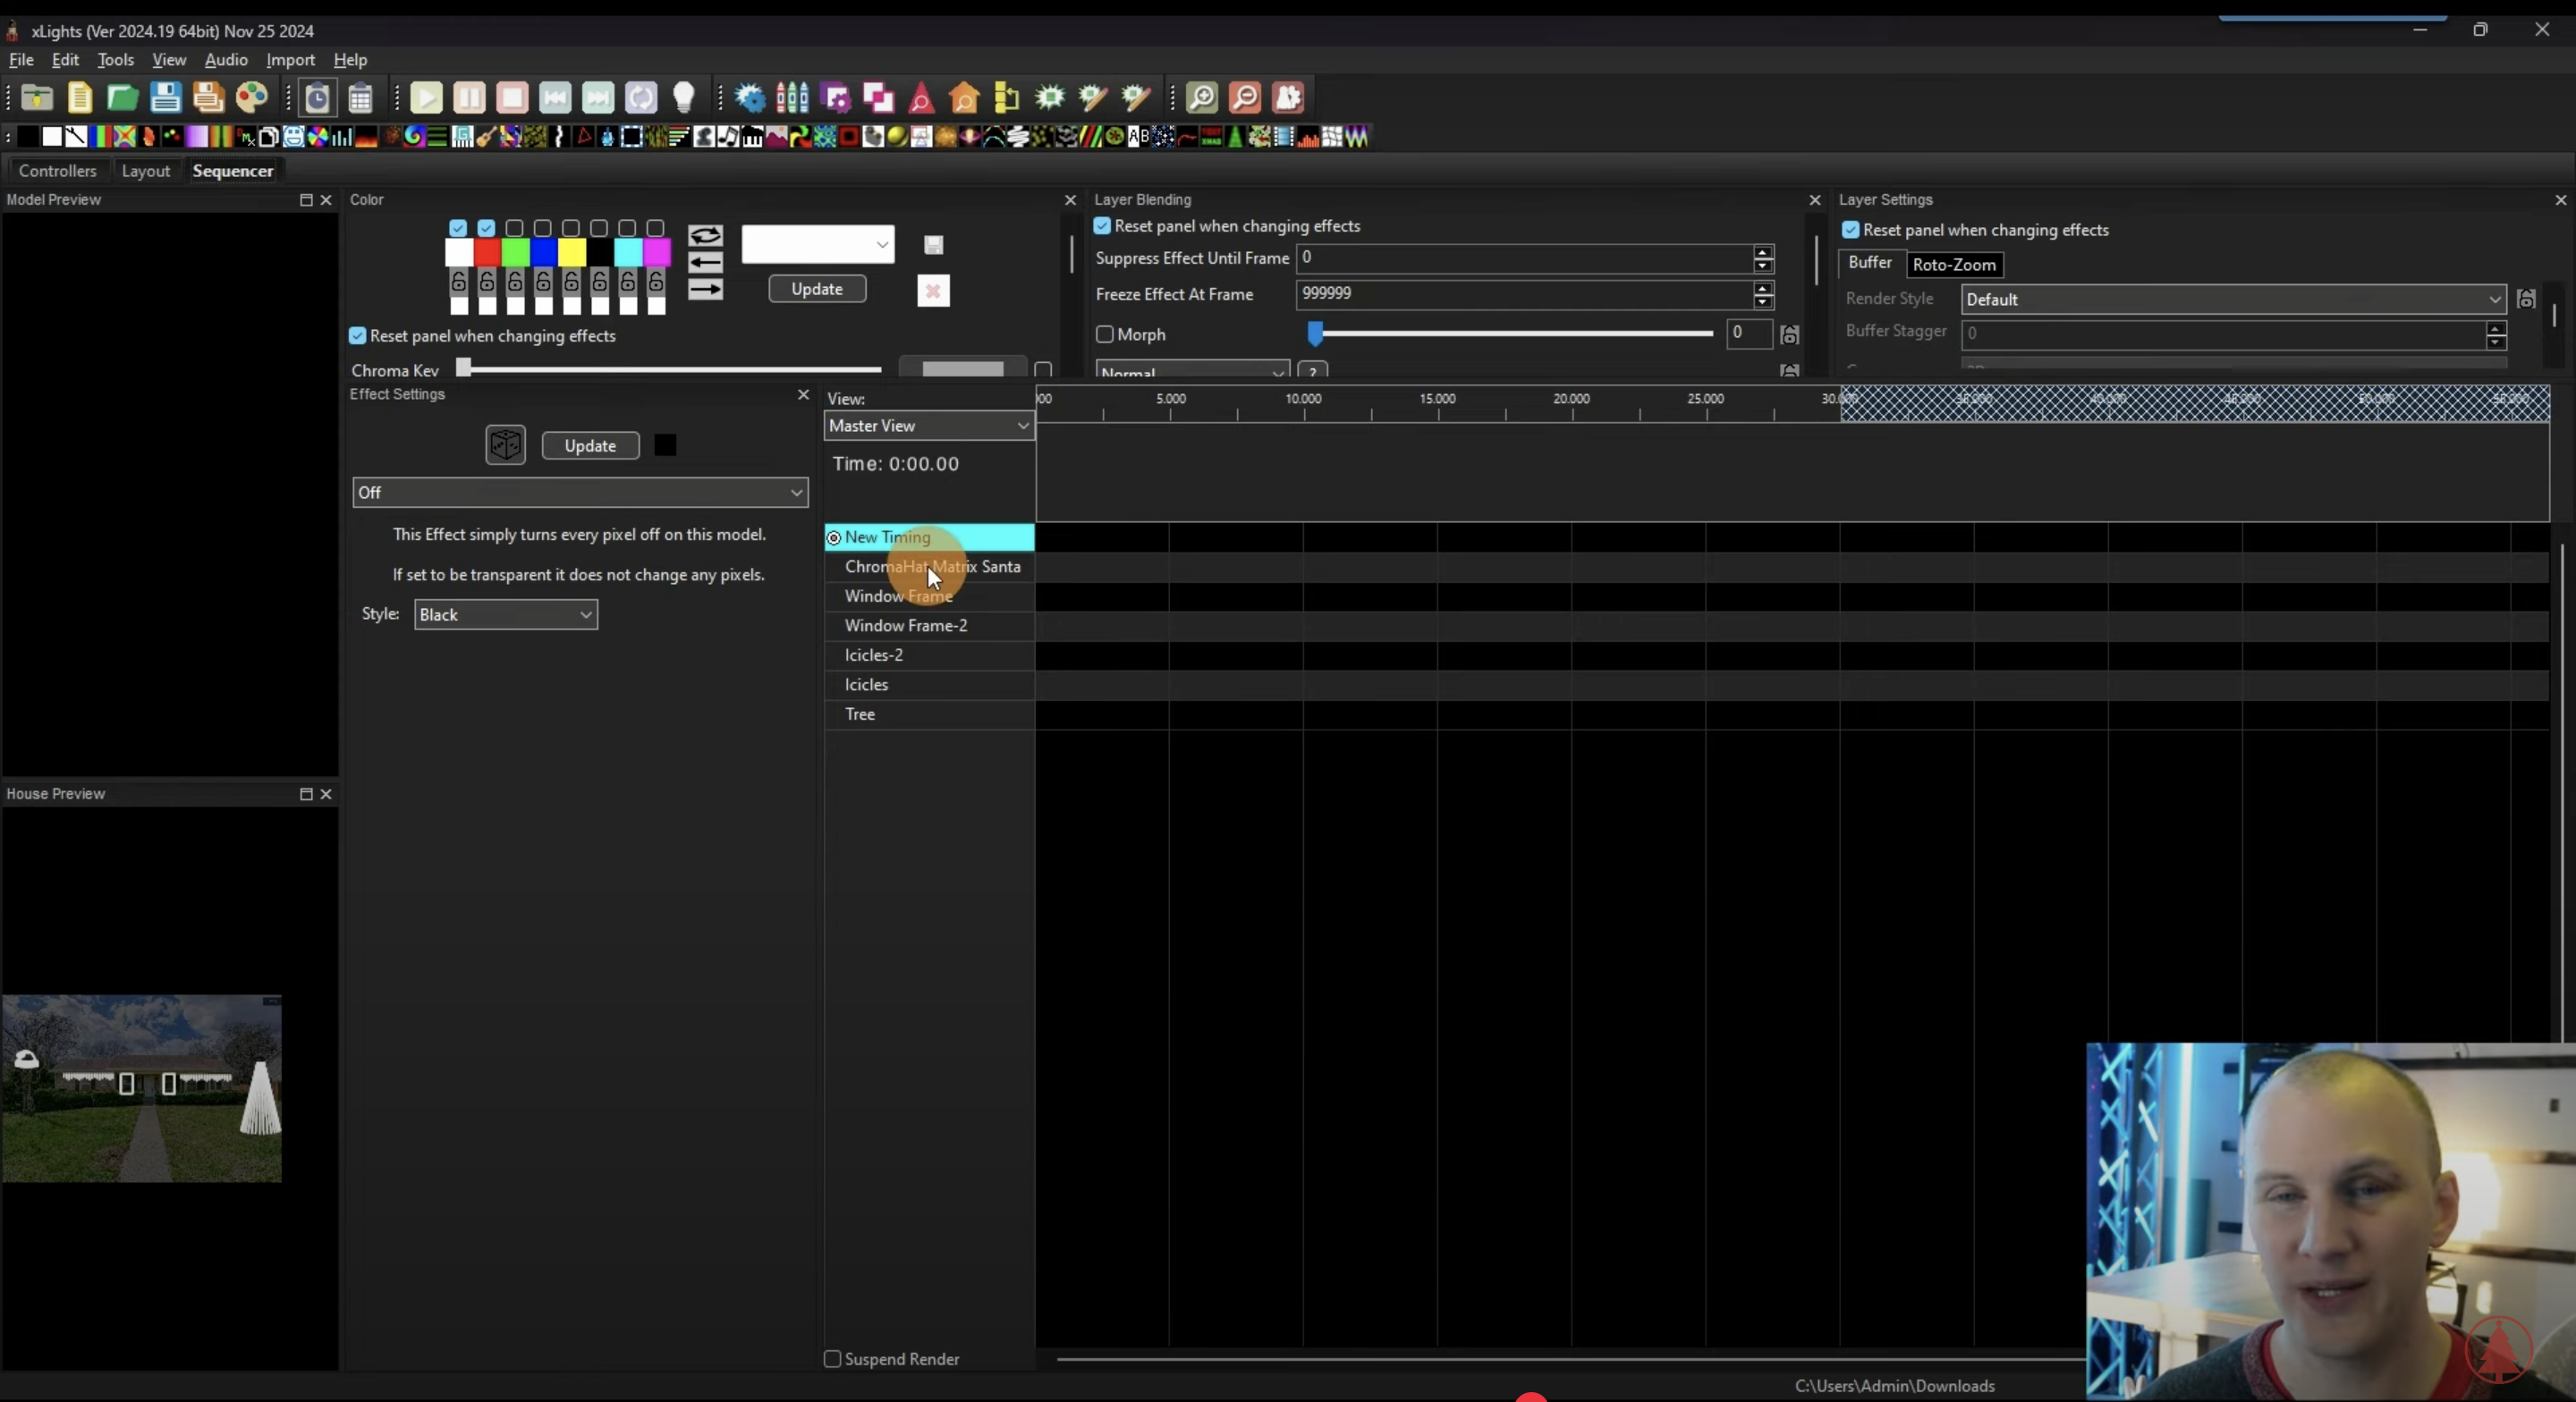
Image: Sequence created and props added, ready to add effects
- Drag and Drop: Simply drag an effect from the top bar onto a prop on your timeline. For example, drag an On effect to turn on a prop. You'll see the effect in the two preview windows on the side.
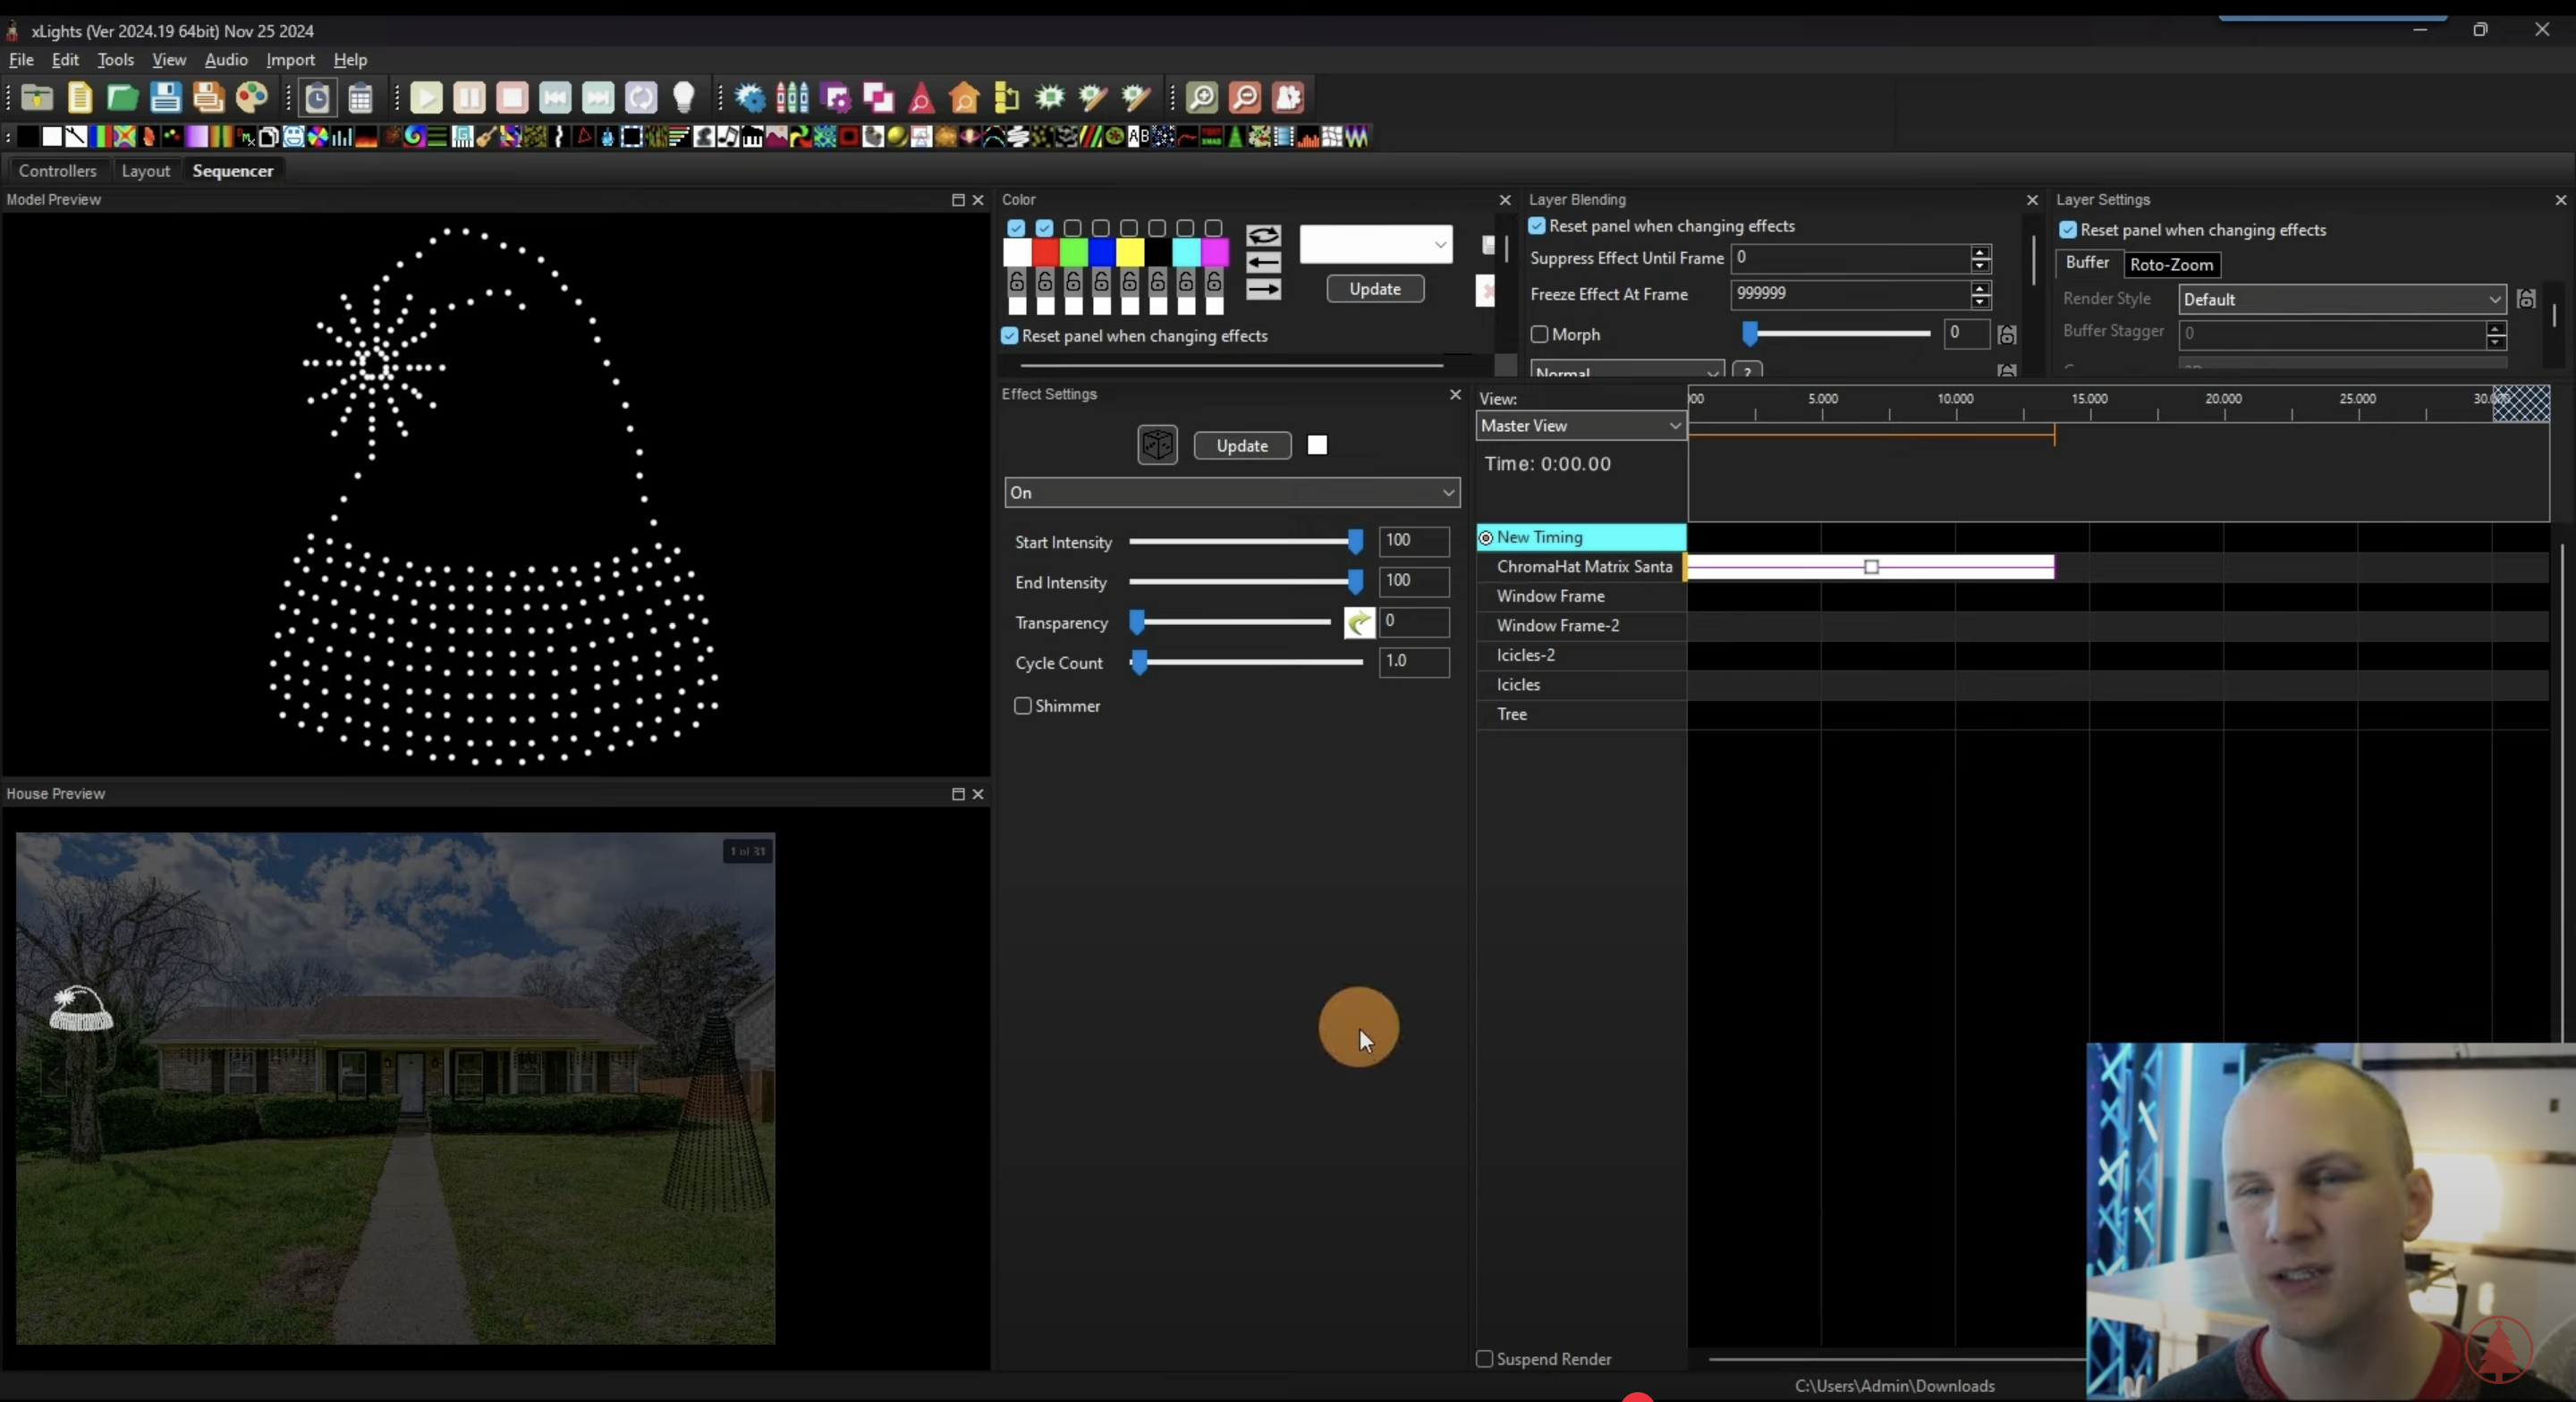
Image: What it looks like after adding the On effect to the ChromaHat prop
- Customize: You can adjust colors and other parameters for each effect.
- Layering: To create more complex animations, you can right-click on a prop in the timeline and select Insert Layer to stack multiple effects.
Using Groups
Groups are a powerful tool that allows you to apply an effect to multiple props at once.
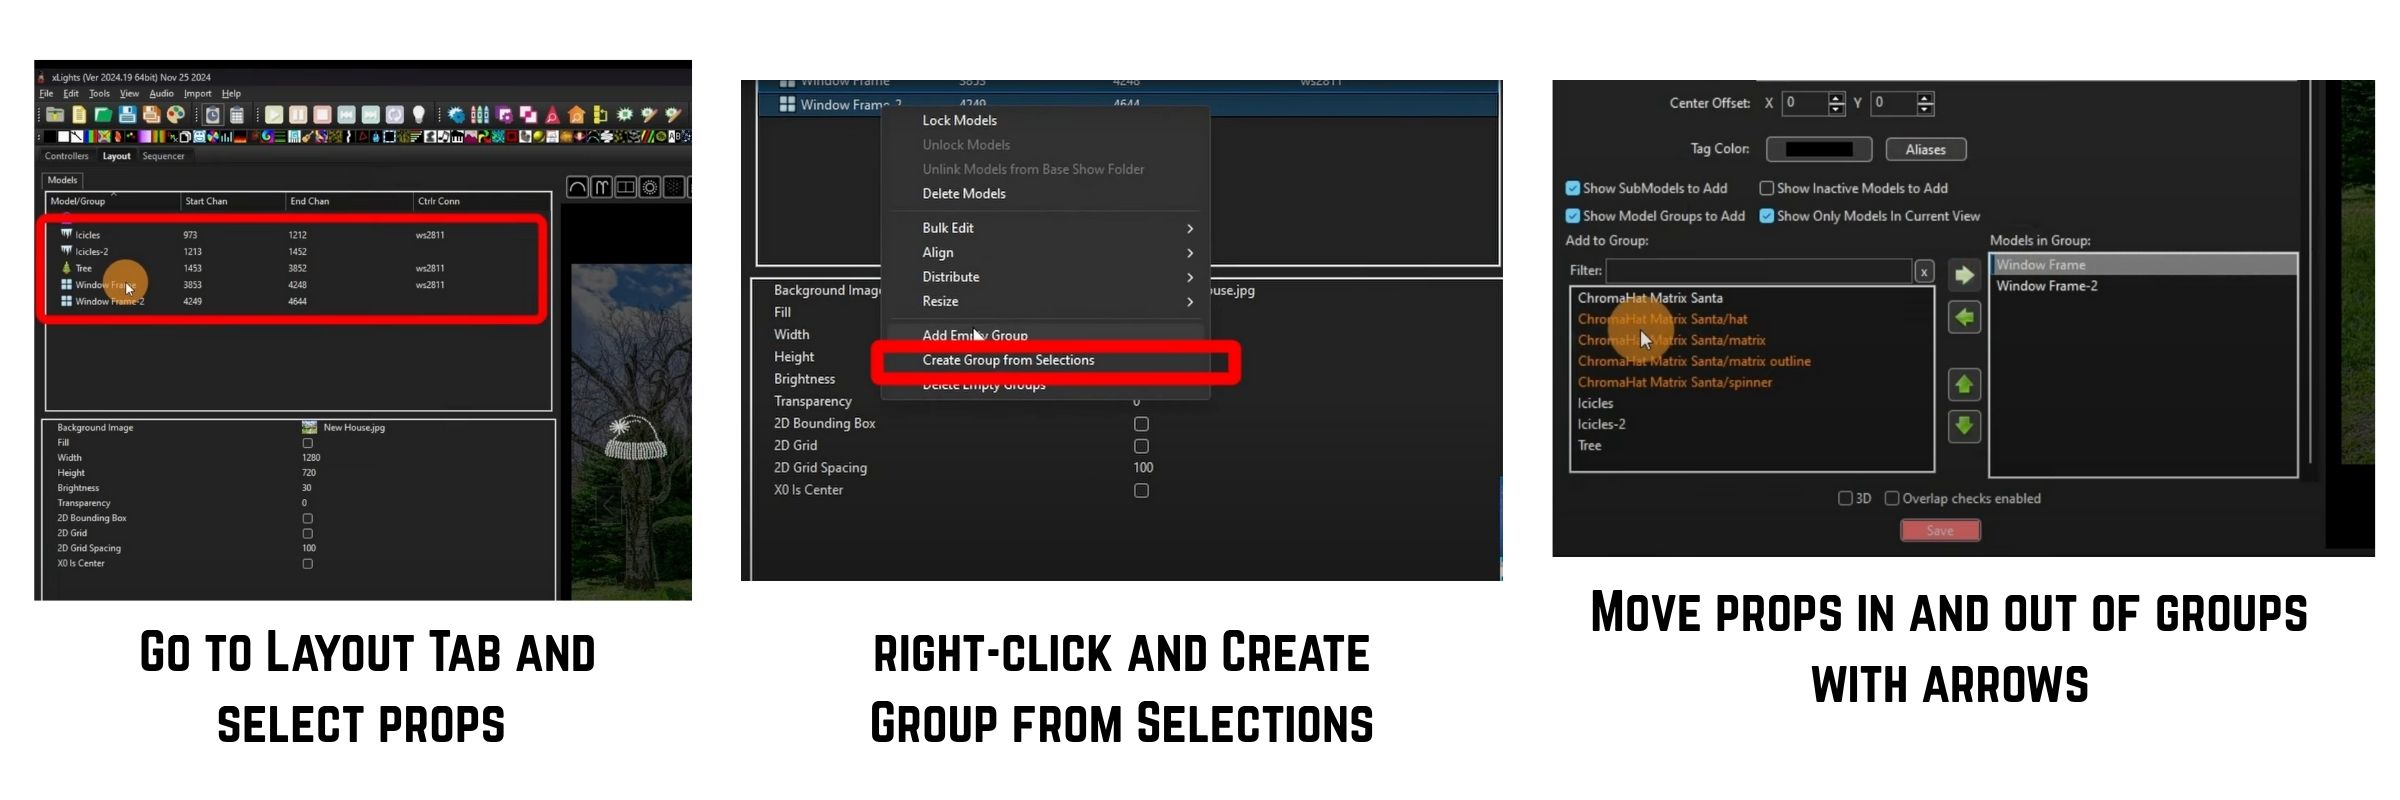
- Creating a Group: Go back to the Layout tab. Select the props you want to group, right-click, and choose Create Group from Selections. Give the group a name (e.g., "All Windows").
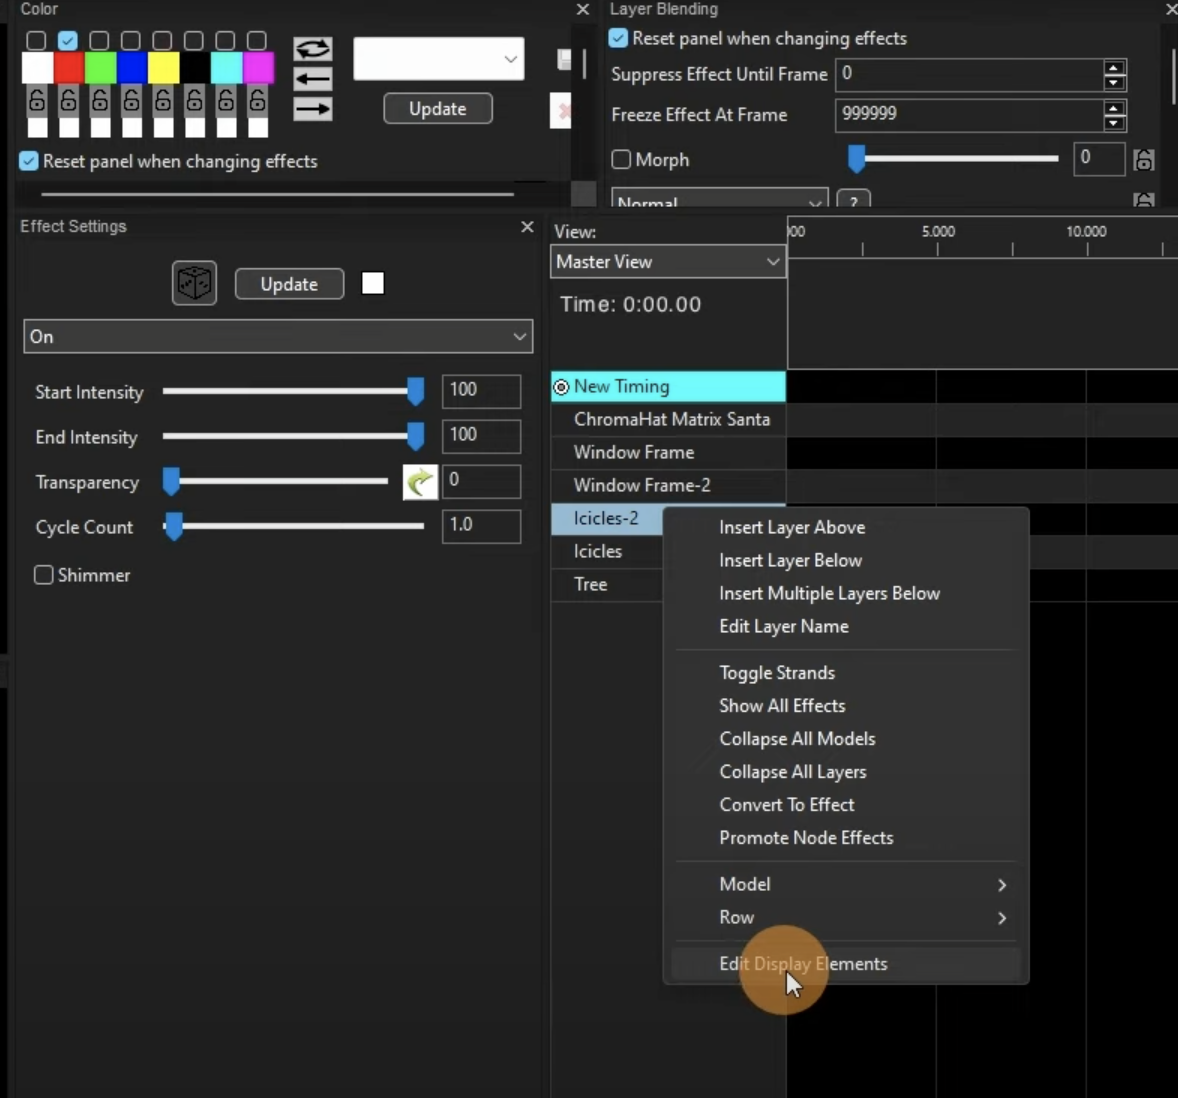
- Adding Groups to Your Sequence: If you create a group while a sequence is open, it won't appear automatically. Go back to the Sequencer tab, right-click on any prop, and select Edit Display Elements. You can then move your new groups from the "Available" column to the "In Use" column.
- Ordering: It's a good practice to place larger groups at the top of your list and smaller, individual props at the bottom.
- Using Effects on Groups: Now that you've set up your groups, you can add effects to them. For example, right-click on your sequencer timeline and select Add timing track. From there, you can choose a timing track based on seconds, metronomes, or music. Note that you'll need the QM Vamp plugins installed to create a music-based track. You can find information on how to get these on the xLights download page.
 .
. 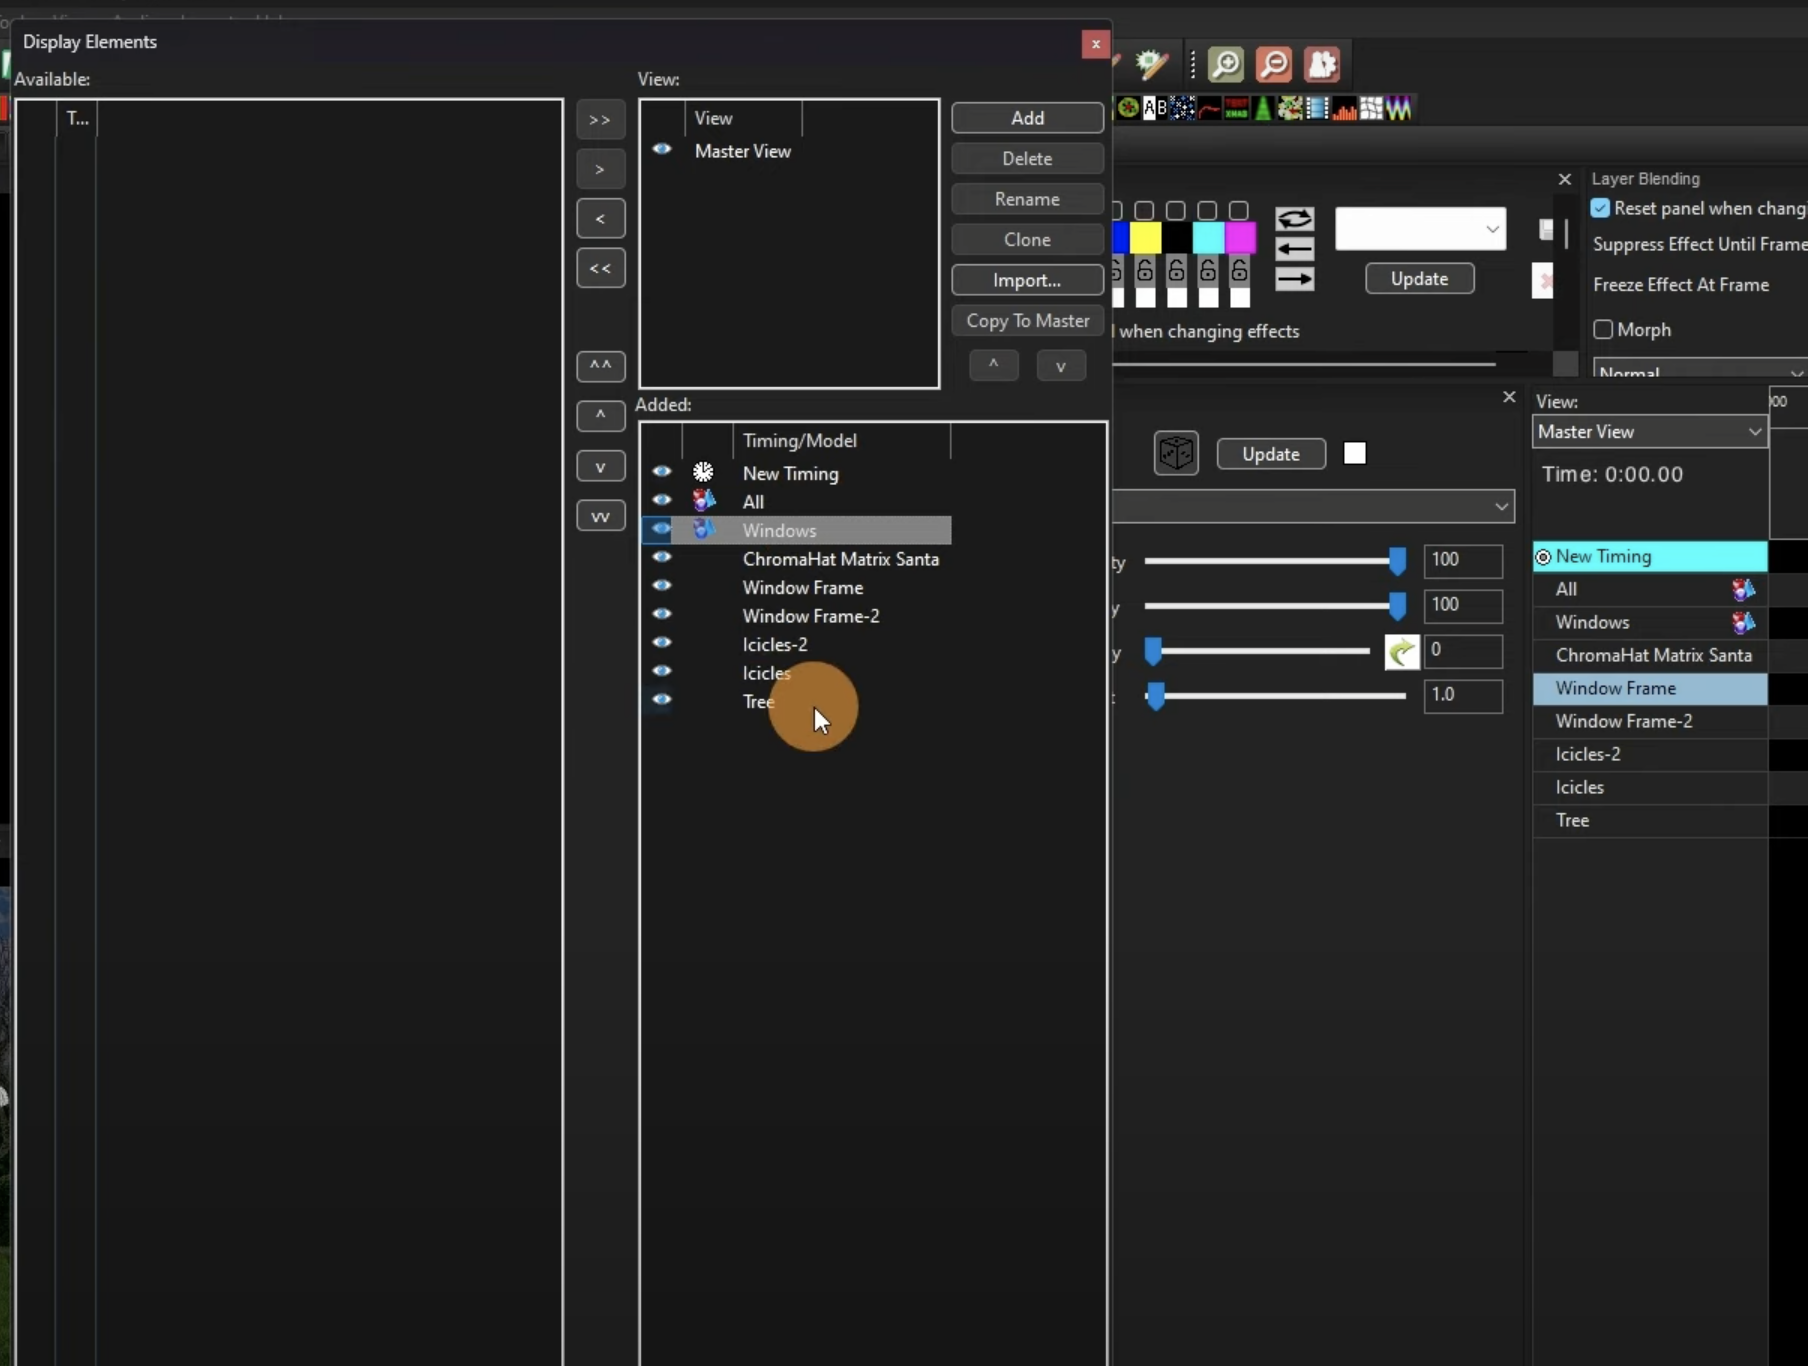
Images: Right-click any prop and select "Edit display elements" to move Groups to In Use column
Bringing on new effects is simple. You can drag and drop an effect onto a single prop, or you can drag it onto a group you've created. When you place it on a group, the effect will be spread across all the props in that group. You can adjust various properties of the effect, such as its thickness, to see the changes in your preview windows.
Then experiment by layering effects on top of one another! To add multiple effects to the same prop, you can right-click on the prop and select Insert Layer. Try different things and see how it works.
Additional Resources and Closing
By following these steps, you'll be able to create a basic layout and start experimenting with effects in xLights. This is the foundation for building your very own holiday light show.
For a comprehensive, step-by-step course that covers everything from programming to the practical side of setting up a display, you can check out the Learn Christmas Lighting Academy. The academy also includes community forums where you can get expert advice.
Finally, if you're ready to purchase lights and other gear, come shop with us at Above AVL. We’d love to help you find the products you need to design your perfect light show this season!
Want to Create a Great Christmas Lighting Display This Year?
Grab our free guide and get started today:

