
Pixel2DMX Review: A Game Changer for Holiday Light Shows
Hi friends! Today we're diving into a review of the Pixel2DMX, a newer addition to our store. We’ll explore how it works, how to set it up in Xlights, and why it might be a great addition to your setup if you're using DMX fixtures or moving heads.
![]()
Understanding DMX Output from Controllers
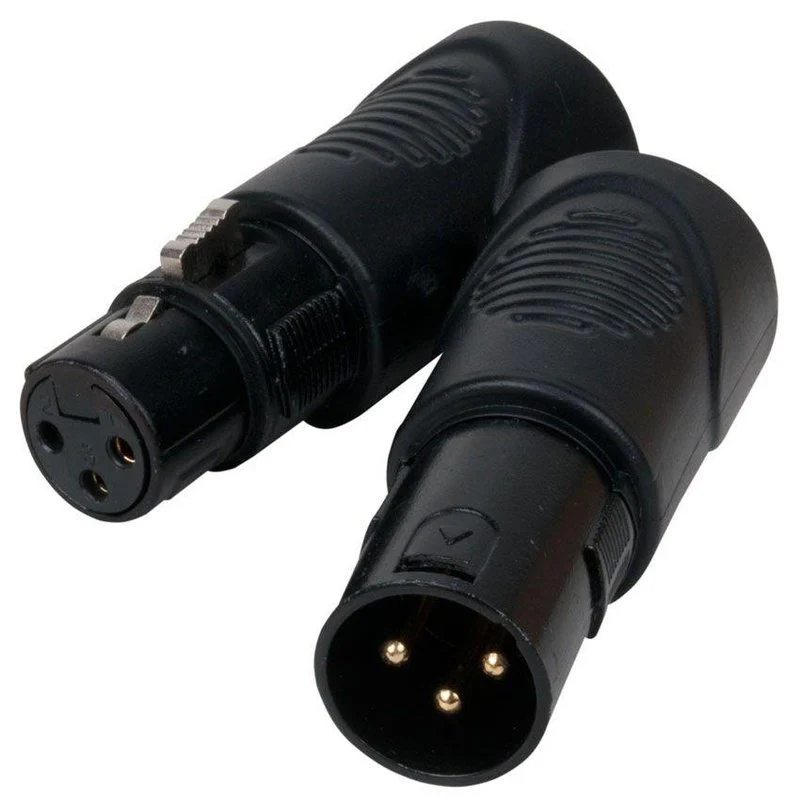
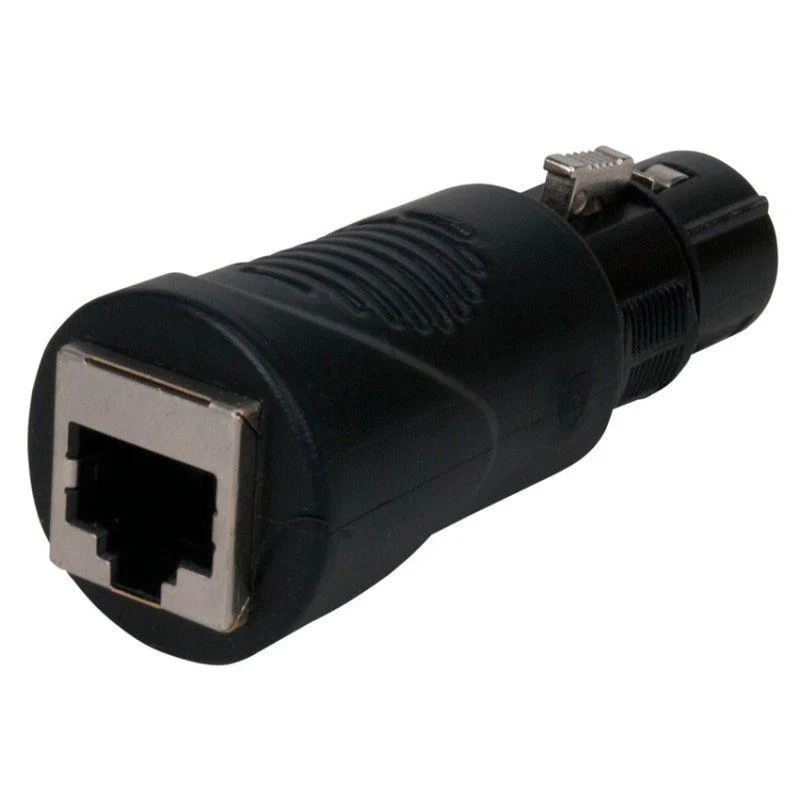
When setting up DMX output from a controller, there are a few ways to do it depending on your controller. Many controllers, like the Genius and Falcon series, come equipped with RJ45 ports labeled for DMX. You can connect an Ethernet cable from these ports to an RJ45-to-DMX adapter. We offer a two-pack of these adapters on our site, providing both connection directions.
In many holiday light shows, DMX cables often stretch across long distances to reach lighting fixtures. Running hundreds of feet of DMX cables can be cumbersome. Some controllers require stripping DMX wires and connecting them to terminal blocks, which can loosen over time due to seasonal temperature changes, causing connectivity issues.
Introducing the Pixel2DMX
A few years ago, the Experience Lights team introduced the Pixel2DMX. This small device is incredibly helpful for simplifying DMX connectivity, especially in large light shows.
With traditional setups, DMX cables must run long distances, weaving through various fixtures and props. For example, at my house I might run it from the controller through a fog machine, up to the moving heads, across my roof, through more moving heads, then it’s got to come back to the ground to run through more fixtures – I end up running hundreds of feet of DMX wire.
However, most Christmas light displays already have pixel wiring in place. The Pixel2DMX takes advantage of this by using existing pixel lines to transmit DMX data, reducing the need for extensive cabling.
How the Pixel2DMX Connects
The Pixel2DMX connects directly to 12V pixels via an xConnect plug. Once connected, it provides a DMX output, utilizing extra channels within your existing pixel setup to control DMX fixtures.
Instead of running long DMX cables, you can place the Pixel 2 DMX at the end of a pixel string, where voltage may already be dropping. The device draws power from the pixels and outputs DMX signals through a short DMX cable, directly linking to your moving heads or other DMX fixtures.
Setting Up the Pixel2DMX in Xlights
I built a fresh Xlights project for this setup and tested whether my Genius controller would be automatically discovered. It was! After setting it to DDP mode, I proceeded to configure my layout:
- Add Pixels – I started with opening the Layout tab and adding my string of 100 pixels.
- Import the DMX Fixture Model – I added my Dominar X fixture into the layout.
- Assign to Port – Open the visualizer and set up pixels and Dominar on Port One.
- Note the Start Channel – The visualizer indicated my DMX start channel is 301 (*but keep reading to see why this is incorrect!).
- Upload and Test – I saved my layout and uploaded the output, then began sequencing a test animation.
Wiring and Testing the Lights
As we transition to talking about hooking up wires, now might be a good time to mention my favorite cable ties. We’ve got these great, heavy-duty, outdoor-rated cable ties here at Above AVL, available in an affordable 25-pack. They’re perfect for keeping your Xconnects, DMX cables, and even extension cords neatly wrapped, making setup and storage much easier.
Now it’s time to wire up those lights. First, connect the DMX cable to the Pixel2DMX and the moving head, then set the DMX address on the fixture.
Troubleshooting the Setup
So everything is connected, and set up correctly in Xlights. However, I ran into some issues the first time I tried transmitting signal to my lights—my moving heads weren’t responding to DMX signals.
After some investigation and experimentation, I realized my mistake. Xlights told me, based on where I put the Pixel2DMX after the string of lights, that the fixture’s DMX address needs to be set to 301. However, that was incorrect, because the Pixel2DMX does not follow Xlights' displayed DMX addresses. Instead, it always starts transmitting at DMX address 1 for the first fixture connected.
This means:
- The first fixture connected to the Pixel2DMX should be set to DMX address 1.
- The second fixture follows based on channel count (e.g., if the first fixture has 14 channels, the second fixture’s address should be set to 15, and so on).
Once I corrected this, everything worked perfectly! My moving heads responded as expected, and the Pixel2DMX was successfully integrated into my lighting setup.
Final Thoughts
I highly recommend the Pixel2DMX for anyone running a holiday light show. It greatly simplifies DMX wiring, eliminating the need for stringing long cables across your yard while integrating seamlessly with existing pixel setups.
If you’re interested in purchasing one, or need other Christmas lighting supplies, check out our holiday store at Above AVL! Supporting us helps us continue providing helpful content and resources for your lighting projects.
Thanks for reading, and happy lighting!
Want to Create a Great Christmas Lighting Display This Year?
Grab our free guide and get started today:

